MOPS 4.0 Excel Add-In Installation
Steps for Deployment of an Excel Add-in
Prerequisite: Admin permissions to Microsoft 365 Admin Center.
Microsoft 365 admin center
-
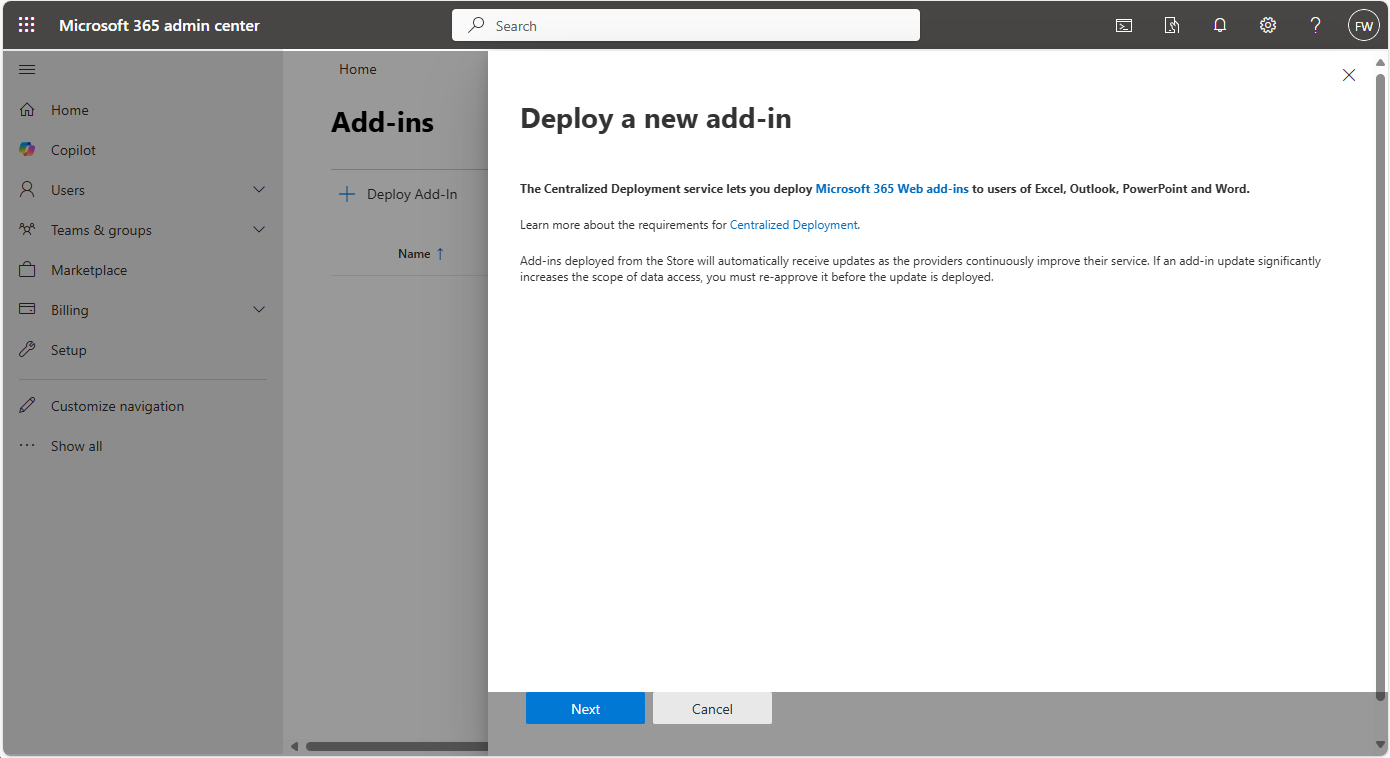
Log in as
adminto the admin center at https://admin.microsoft.com/#/homepage -
Expand
Show allin the left menu (this will showSettingsin the left menu). -
Expand
Settingsin the left menu and selectIntegrated Apps. -
Press the
Add-inslink in the first paragraph to open https://admin.microsoft.com/#/Settings/AddIns -
Press
+ Deploy Add-in, which will open a right menu. -
Press
Nextat the bottom.
-
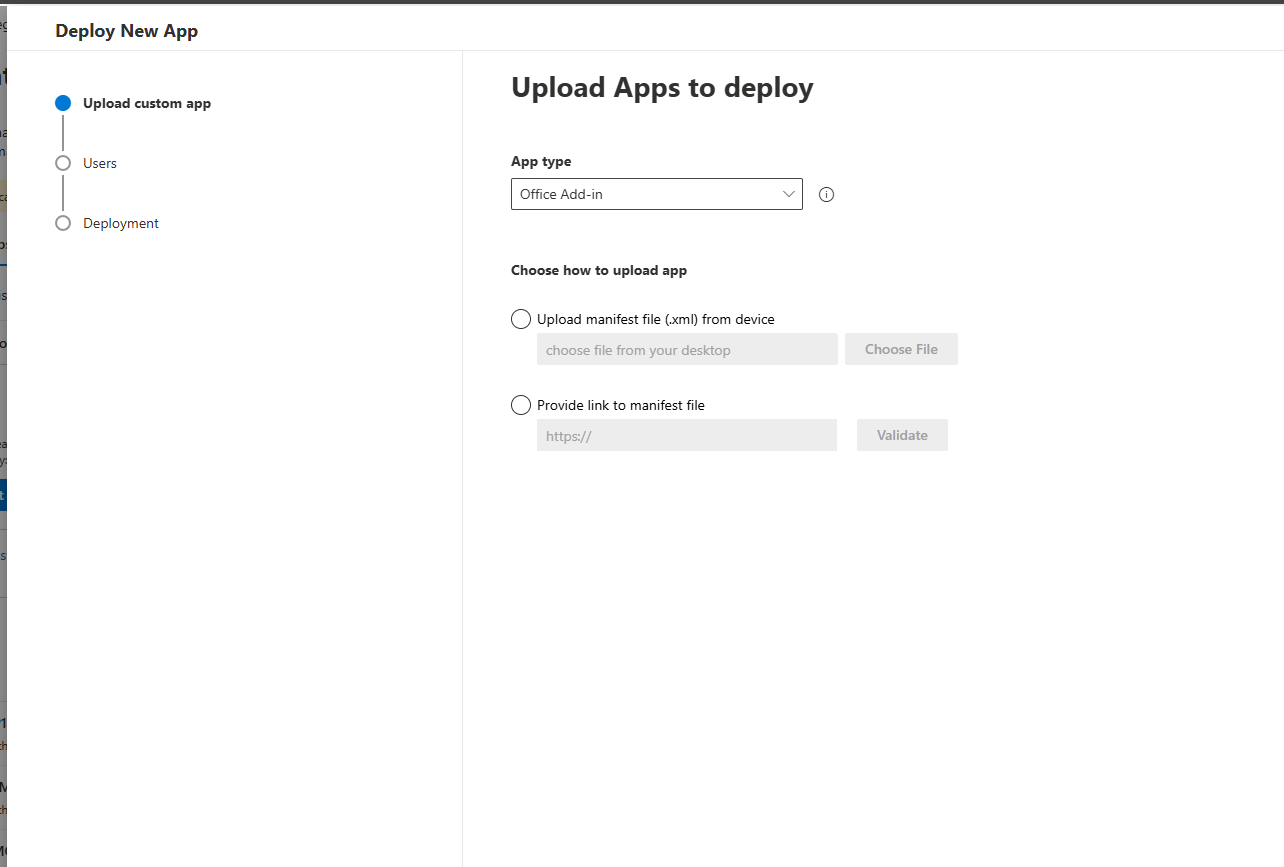
Select
Upload custom apps. -
Select
Choose Fileand find and open themanifest.xmlfile.
You can upload a manifest.xml file while it is located at {{baseUrl}}/excel-addin/manifest.xml
OR
You can use the option to provide the link to the manifest.xml, i.e., {{baseUrl}}/excel-addin/manifest.xml
- Assign Users to: Everyone | Specific users/groups | Just me
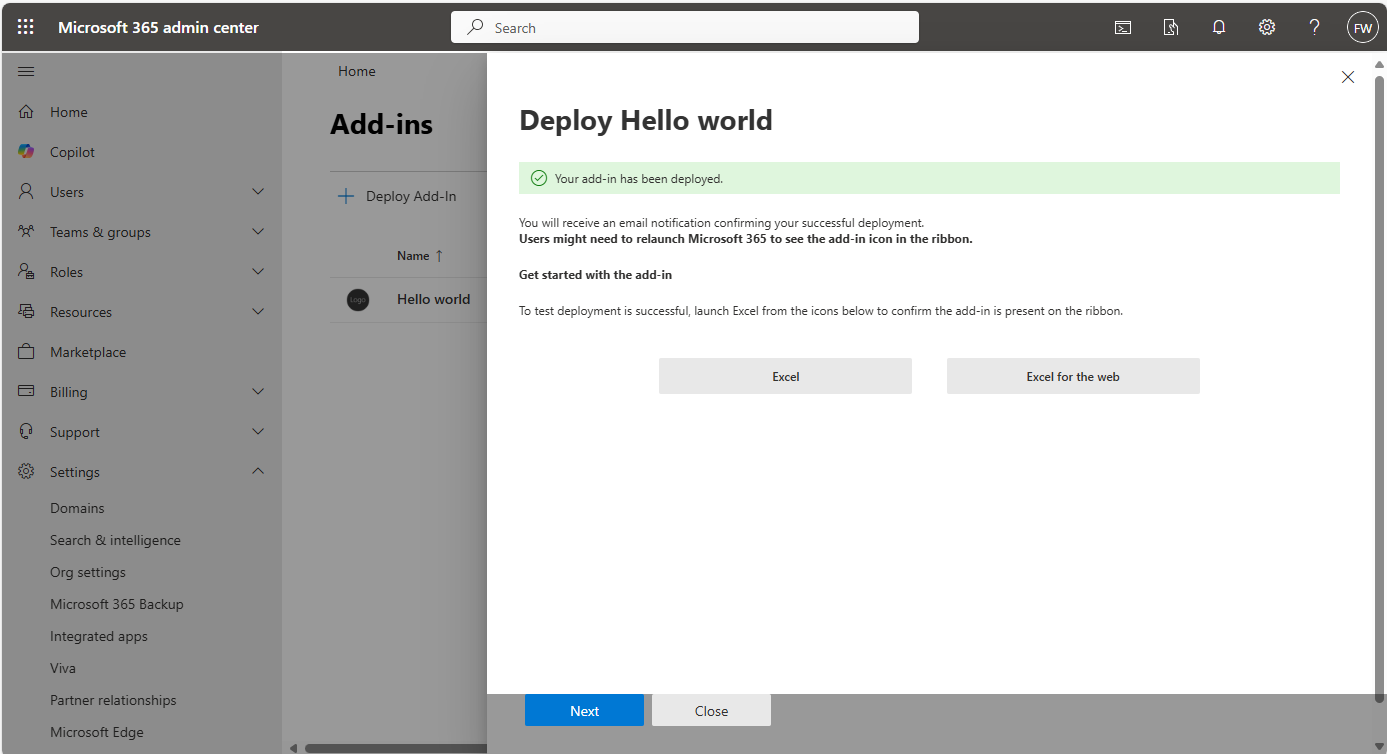
- Press
Deploybutton at the bottom.
Excel users can now add MOPS 4.0 Excel Add-In
-
Open the Excel application and open a sheet.
-
Press the
Add-insbutton (rightmost button in the Home ribbon). -
Press the
[+] More Add-insbutton.
-
Select the ADMIN MANAGED tab in the Office Add-ins dialog.
-
Select the added MOPS 4.0 Excel Add-In and press the
Addbutton at the bottom.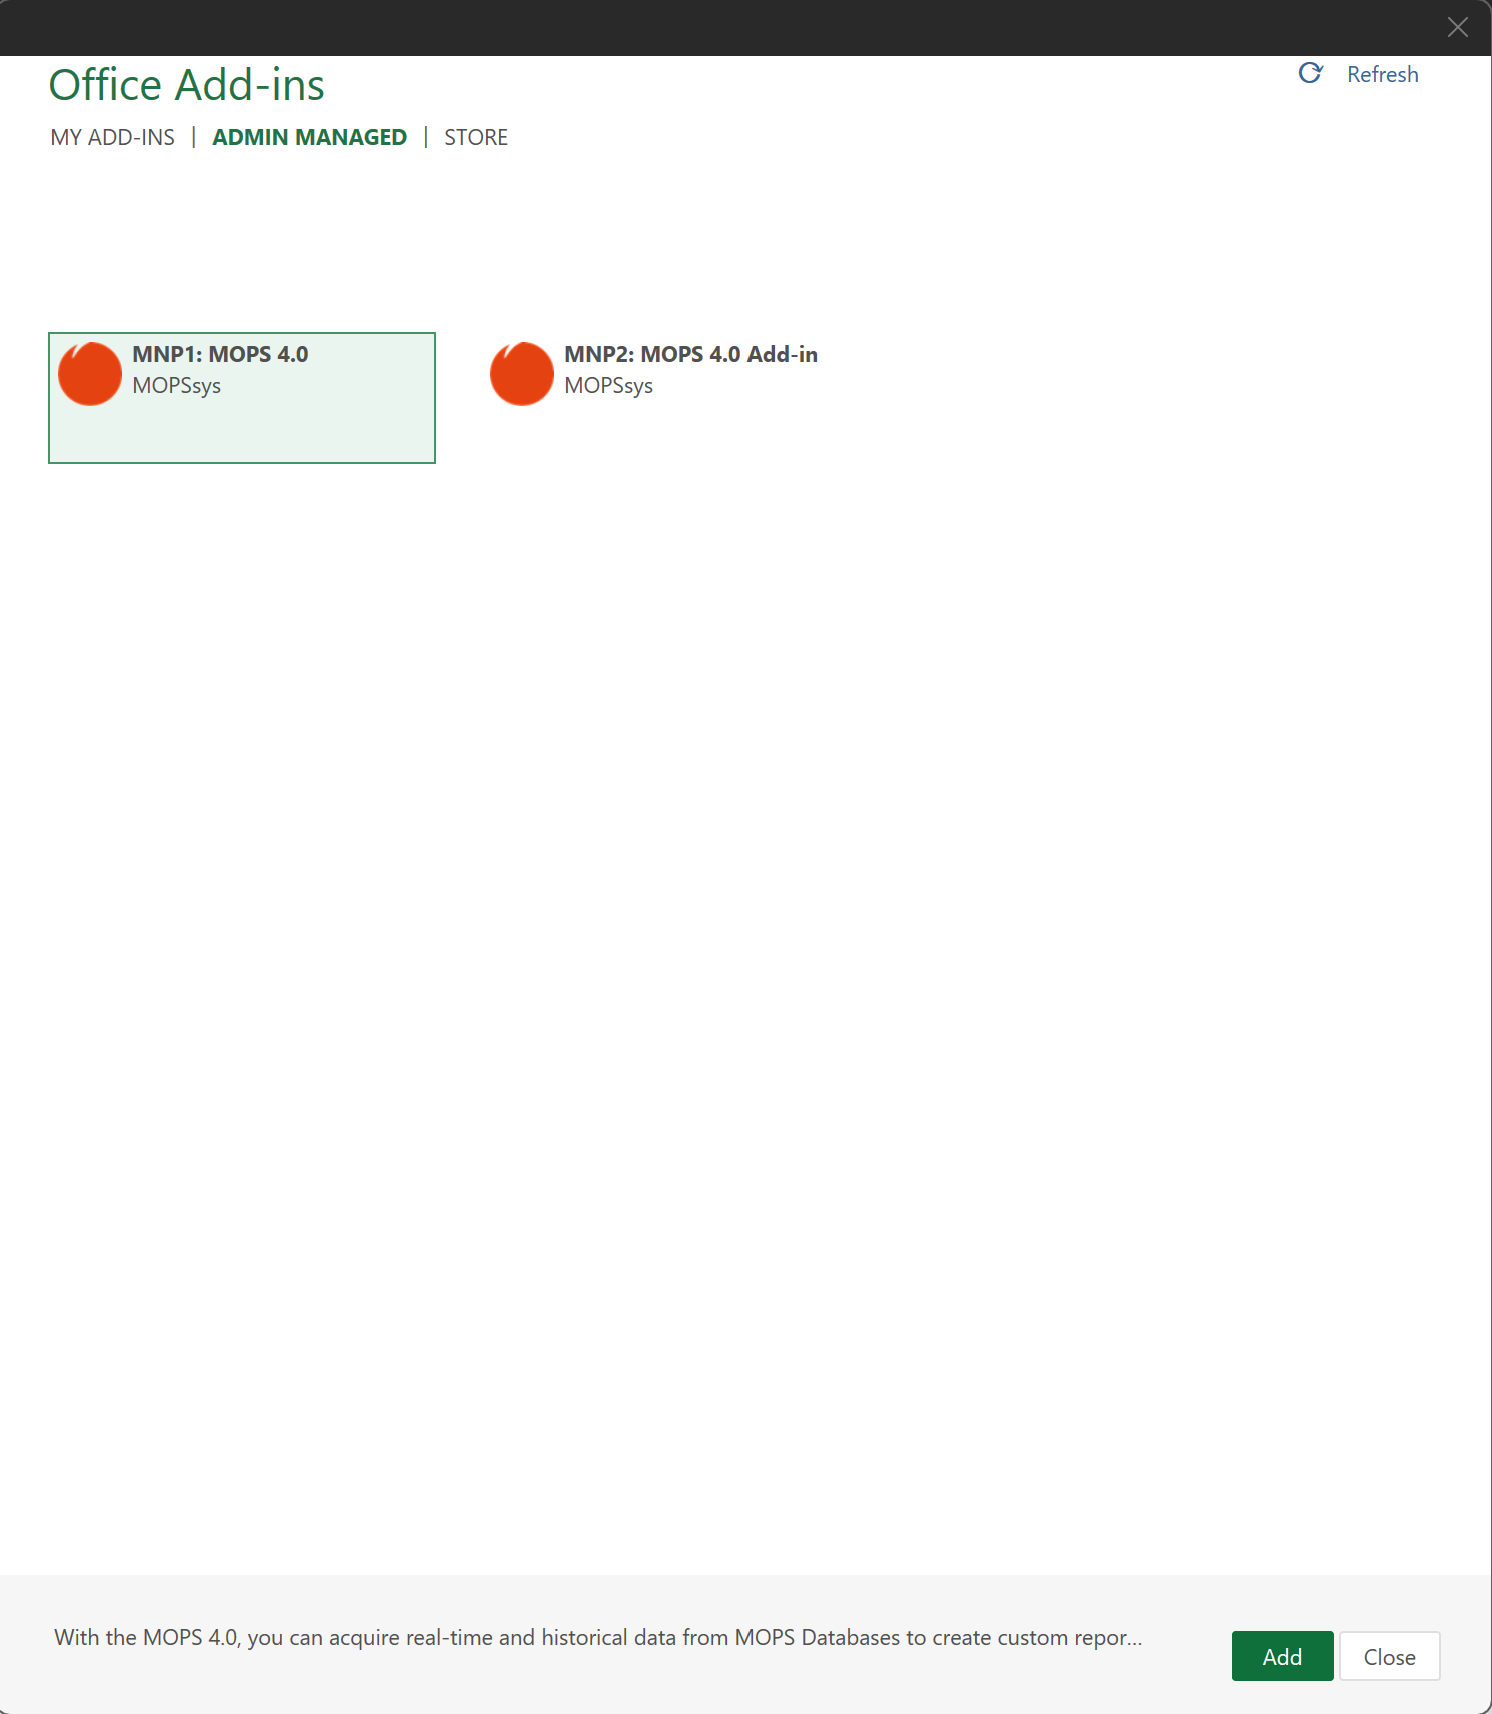
-
The add-in should be added to the rightmost part of the Home ribbon.
-
Pressing the newly added button in the ribbon opens the task pane of the added add-in.